My first take on real world vulnerability research (Part 1)
14 Feb 2021Preface
I was looking for new challenges that could excite me (and fill my CV) in early 2019. One day, I saw this picture on a slide from Yuki Chen.
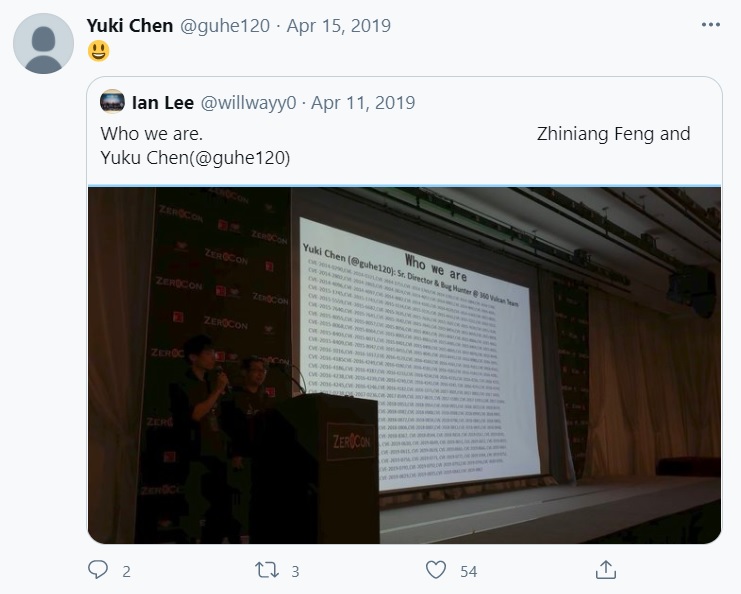
“Oh, CV is inside CVE, so CVEs can make my CV complete!”
Since my goal was to obtain a CVE within a short period of time, I decided to go with fuzzing. That is how I start my journey to look for CVEs. Luckily, we were assigned 2 CVEs after reporting 5 issues to Apple WebKit, namely CVE-2019-8678 and CVE-2019-8685. In this series of blog posts, I will walk through some basic ideas of fuzzing. We will also get started on fuzzing, debugging and developing exploits. We have also shared our experience in HITCON 2020. In the first part, we will look into fuzzing and enumerating targets.
Disclaimer: The content of this blogpost is written in late 2019 and some of them are not up-to-date. It only serves as a reference for beginners. You will not need this if you have sufficient knowledge on fuzzing, anyway.
What the fuzz?
Fuzzing is an automatic testing strategy used to look for security vulnerabilities. In short, this is a methodology to analyse software behaviour by sending it random data.
In general, a vulnerability can only be accounted for CVE 30-60 days after patching, and fuzzing is the least time-consuming method to discover vulnerabilities. I recommend this article for some terminology for fuzzing. I will just cover four of the important terms here.
Instrumentation is a code snippet that is inserted into the program to gather execution feedback. Usually, it is used for collecting code coverage and detect memory corruption. There are two types of instrumentation methods, static and dynamic instrumentation. For static instrumentation, it is performed at compile-time, which imposes less runtime overhead compared to dynamic instrumentation. On the other hand, one of the benefits of dynamic instrumentation is that they are easily applied to binaries during runtime. DynamoRIO and Pin are two examples of instrumentation tools.
Seed (or corpus) is the initial input files to the fuzzer to carry out mutation. The reason for using seed instead of random data is that completely random input may not be able to pass the sanity check for a lot of parser or fuzzing target. Seeds are used to make the results of fuzzing more meaningful.
Mutation transforms an input into new input. There are some well-known and simple mutation strategies, for example, bit flipping and embed tokens from user-defined dictionaries. Both of them were implemented in AFL. There are also some advanced strategies like tree-based mutations used in Superion or EMI.
Code coverage is a measurement of the proportion of the code being executed. There are various level of coverages like instruction coverage, branch coverage, line coverage. In C/C++ projects, we can use gcov to collect coverage by compiling our program with special flags, and we can use lcov to visualize the coverage collected.
First attempt (Failure)
There are some state-of-the-art fuzzers in the public domain like AFL, Honggfuzz, peach, libfuzzer. With so much choice, libfuzzer and AFL have caught my attention. However, I picked AFL (American Fuzzy Lop) as my first attempt. It is a well-known fuzzing tool and contains many features that I need. This includes instrumentation, mutation, code coverage measurement and forkserver. Most importantly, we don’t need to spend time to audit the code and write harness for fuzzing, just like the case for libfuzzer. If you want to have an introduction to libfuzzer, I highly recommend this talk from @nedwill and his fuzzer for Chrome IPC. Anyway, let’s get back to AFL, it is available here. You can also refer to the documentation for deployment.
Note: I will recommend starting with afl++ since it is actively maintained by the community nowadays…
Setting up
sudo apt-get install clang autoconf make cmake
# Build AFL...
# cd to where you extracted AFL
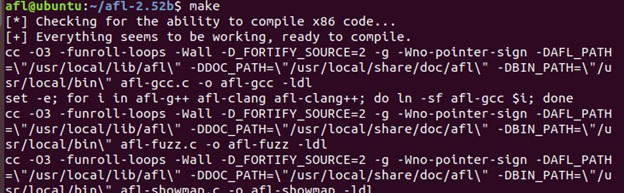
make
After AFL is built, add the below line to ~/.profile.
export PATH=$PATH:<where you build your AFL>
To build your fuzzing target, configure the cc compiler to the AFL’s version:
export CC=afl-gcc
export CXX=afl-g++
Continue the remaining steps from the documentation to build the application.
Note: In AFL, there is a LLVM mode. You can find the code and instructions for building it inside the llvm_mode folder of AFL source code. Its report has a 10% increase in performance when compare with default mode, though I didn’t use it this time.
Different software may have slightly different settings, just RTFM before everything is ready. Here are some examples I came across as reference:
# For libjpeg-turbo
cmake -G"Unix Makefiles" -DCMAKE_C_COMPILER=afl-gcc -DCMAKE_C_FLAGS=-m32

# For ImageMagick
cmake -DCMAKE_CXX_COMPILER=afl-clang++ -DCMAKE_CC_COMPILER=afl-clang

# From Vim
CC=afl-gcc ./configure \ --with-features=huge \ --enable-gui=none
make
From looking around in the post of AFL developer and this post from Checkpoint, I chose to fuzz the JPEG file format as my initial target and targeted on libjpeg-turbo. I need to gather some initial corpus from the below GitHub repositories:
- https://github.com/MozillaSecurity/fuzzdata
- https://github.com/google/fuzzer-test-suite
- https://github.com/libjpeg-turbo/libjpeg-turbo/tree/master/testimages
- https://github.com/fuzzdb-project/fuzzdb/tree/master/attack/file-upload/malicious-images
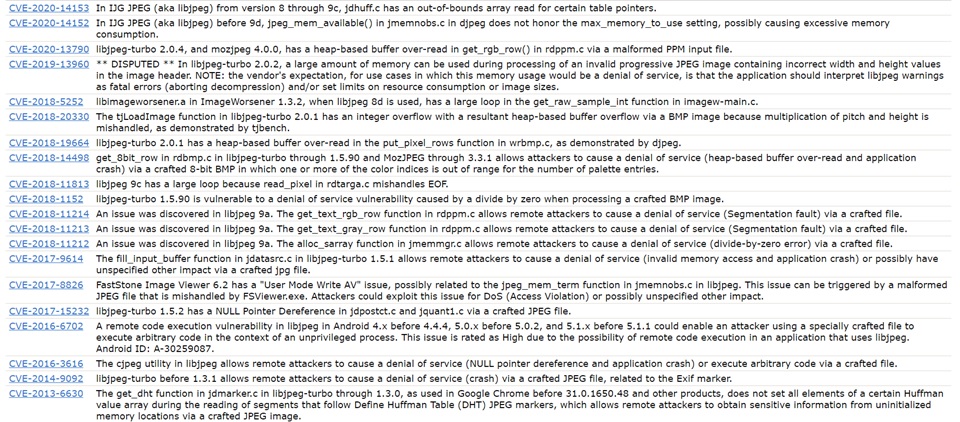
I also collected crash samples and regression tests from various image processing libraries and Exploit-DB. We are able to get some nice samples with correct keywords. For instance:
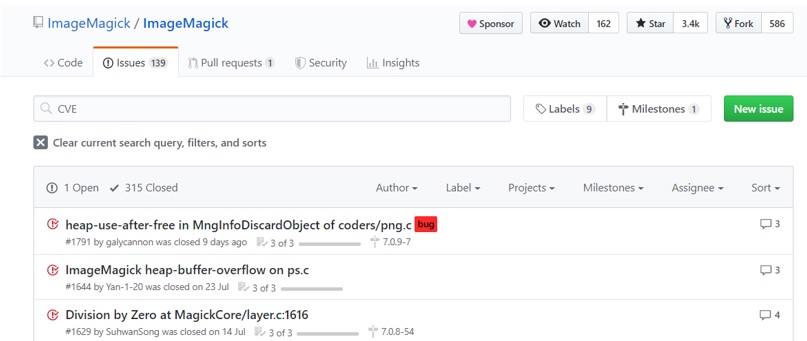
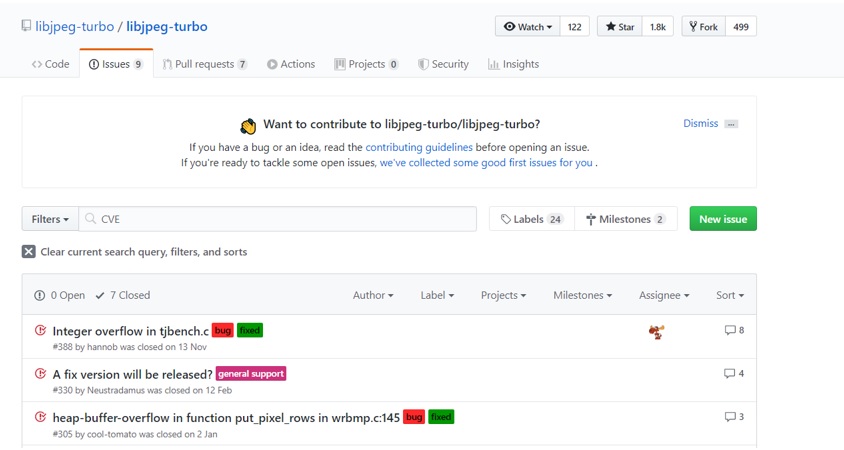
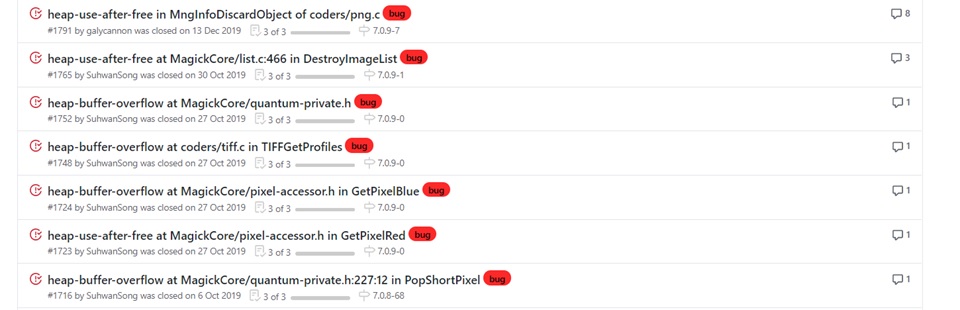
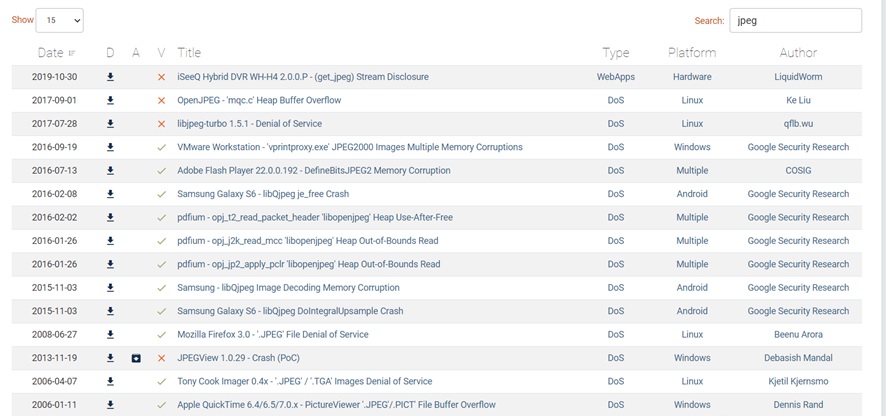
At the same time, you can get a sense of the following questions:
- which part of your target had lots of bugs,
- whether the developers will reward CVE to bugs reported, and
- how long does it take for the developers to fix the bugs.
For now, we had built our target and collected some initial input for the fuzzer. Next, we run this command with the root account (sudo -s):
echo core >/proc/sys/kernel/core_pattern
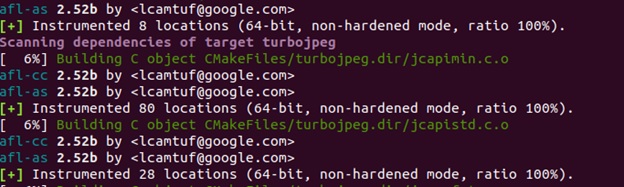
After that, run afl-cmin to minimize the corpus. Before fuzzing libjpeg-turbo, I fuzzed ImageMagick for a few days to collect more initial corpus. Below is the command to run afl-cmin for cjpeg of ImageMagick:
afl-cmin -i input/ -o output/ -t 300000 -m 200 ./cjpeg -outfile /dev/null @@
The @@ in the command is the input field of the original program, and afl will take in @@ as the argument during fuzzing. Also, -t is for setting the timeout and -m is for setting the memory limit.
After running this command, the minimized output will be saved in ./output/.
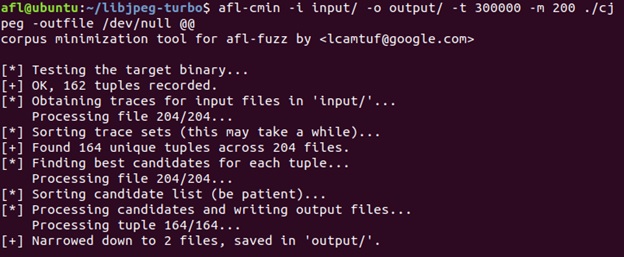
Why cmin?
afl-cmin generates a subset of files that yield the same edge coverage. AFL also has a test case minimization function, afl-tmin. It will attempt to minimize the size of the corpus. Next, we install screen, and we can attach it to the fuzzing processes later (assume using ubuntu).
sudo apt install screen
In my case, I chose to fuzz with 4 cores of my machine and ran the following:
# initialize the master
screen afl-fuzz -i input/ -o output/ -M master -t 300000 -m 200 ./cjpeg -outfile /dev/null @@

# initialize other slave
screen afl-fuzz -i input/ -o output/ -S slave1 -t 300000 -m 200 ./cjpeg -outfile /dev/null @@
screen afl-fuzz -i input/ -o output/ -S slave2 -t 300000 -m 200 ./cjpeg -outfile /dev/null @@
screen afl-fuzz -i input/ -o output/ -S slave3 -t 300000 -m 200 ./cjpeg -outfile /dev/null @@
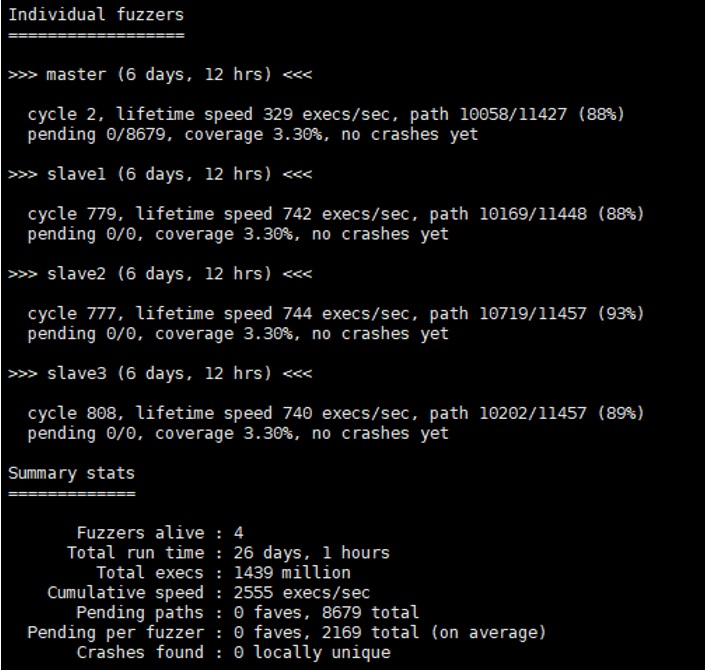
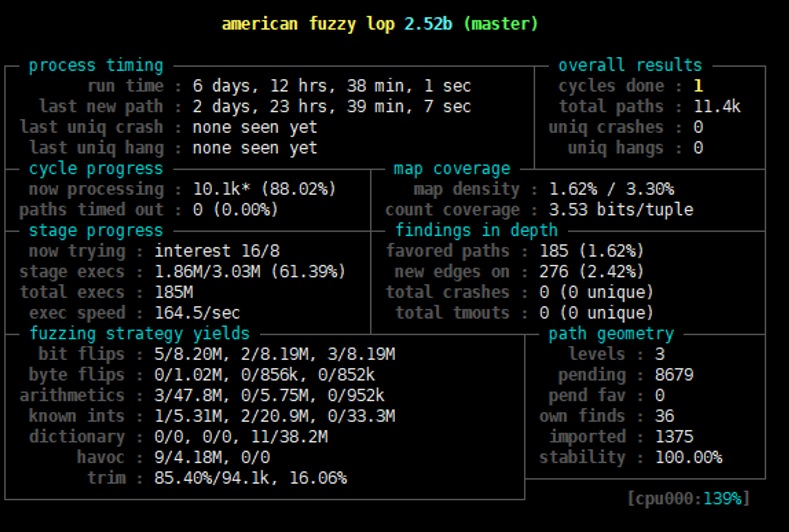
afl-whatsup is a handy extension for monitoring the status of the fuzzers. We can use the command below:
afl-whatsup output/ # output is the folder you set in the -o flag when you start running your fuzzer
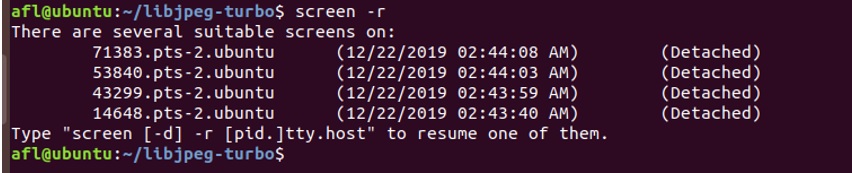
screen -r # for listing process id
screen -r <id> # for attachment
Sadly, no crashes were generated after a week of fuzzing. I recalled this blog post from payatu and decided to further mutate the generated corpus. I remembered that radamsa can digest files and output mutated files based on the input. Therefore, I used the generated corpus from previous fuzzing to radamsa and generate more corpus.
I tried to re-import the output from radamsa. Despite gaining coverage, I couldn’t find any crashes. As everyone and academia were using (and modifying) AFL on these famous open source libraries, it would be impossible to generate meaningful crashes without my own AFL modifications. Angora and QSYM are two excellent academic papers I came across during my self-evaluation. Well, don’t try to mess with things that targeted by academia.
Second attempt (Failure)
Since I am interested in playing browser CTF challenges, why don’t I give a shot to fuzz JavaScript Engines? I recalled the blogpost series on Pwn2Own from ret2system. They had demonstrated using dharma on their first blogpost for the bugs they submitted to Pwn2Own.
Therefore, I started to modify and extend Domato’s grammar to generate pure JavaScript. For those of you who don’t know Domato, it is a context-free grammar code generator originally targeted for DOM fuzzing, developed by Ivan Fratric from Google Project Zero. It supports simple and robust PL features with regular expressions. It also supports JScript, VBScript fuzzing in a later stage. Some security researchers re-engineering it to support more templates like PHP and PDF. You may refer to Ivan Fratric’s post for details.
An advantage of using Domato is the grammar is easy to understand and rewrite. Below is some example copied from its Github repo. And it also supports running Python in the grammar. For details on how Domato works, you may refer to this excellent analysis blog post for Domato’s internal.
!varformat fuzzvar%05d
!lineguard try { <line> } catch(e) {}

!begin lines
<new element> = document.getElementById("<string min=97 max=122>");
<element>.doSomething();
!end lines
Here, I have taken an approach similar to differential testing. We try to execute the same corpus with two different builds of v8 and look for the difference in behaviour. No good crashes were generated despite tons of v8 OOM features and panics. However, I found a hang in the v8 engine that only appears in the later builds using this approach. Even though it is useless, at least we got something this time.
Although I failed to get some bugs with Domato, there are some successful attempts. I am just too weak…
Third attempt (Succeed, maybe?)
I was desperate until I saw Saelo’s open-source tool Fuzzilli.
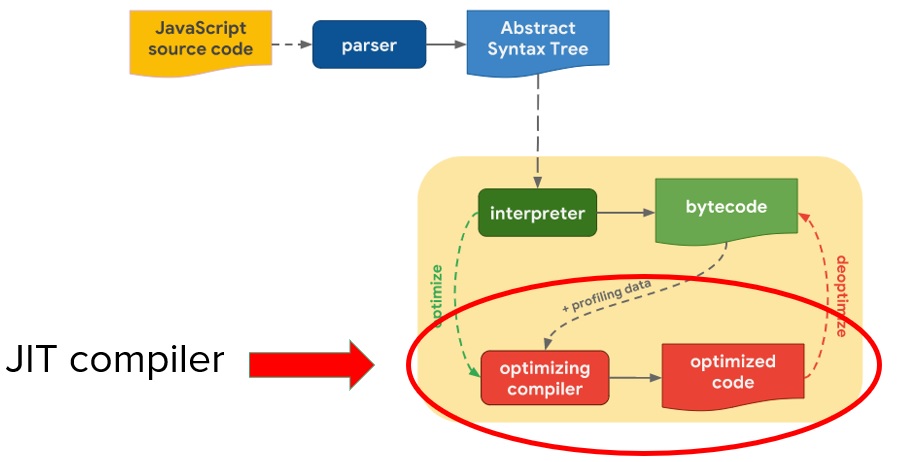
Fuzzilli is a JS fuzzer targeted at JIT engine bugs. JIT engine is an important part of the Javascript engine, which improves the performance of Javascript execution for frequently executed functions.
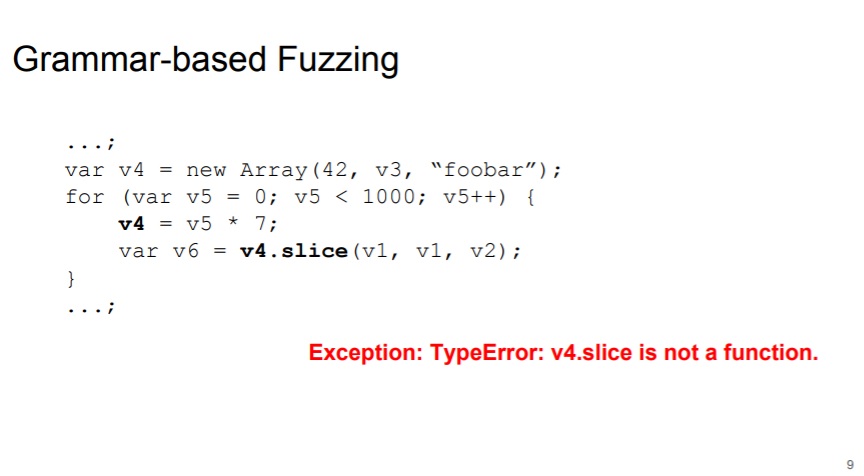
Traditional fuzzer, like Domato or dharma, wrap the statements inside a try-catch block to prevent exceptions. However, this may prevent the JIT Bounds Check Elimination (BCE) optimization. The slides below from Saelo for OffensiveCon illustrated this idea.

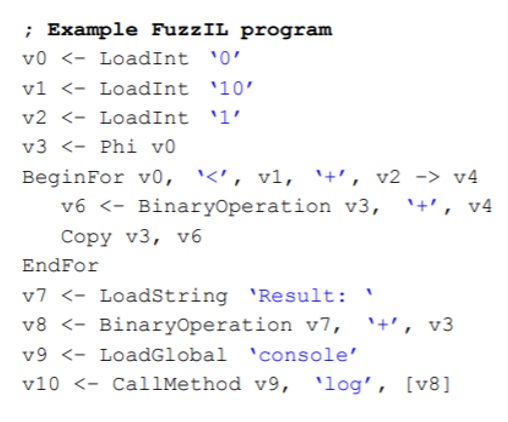
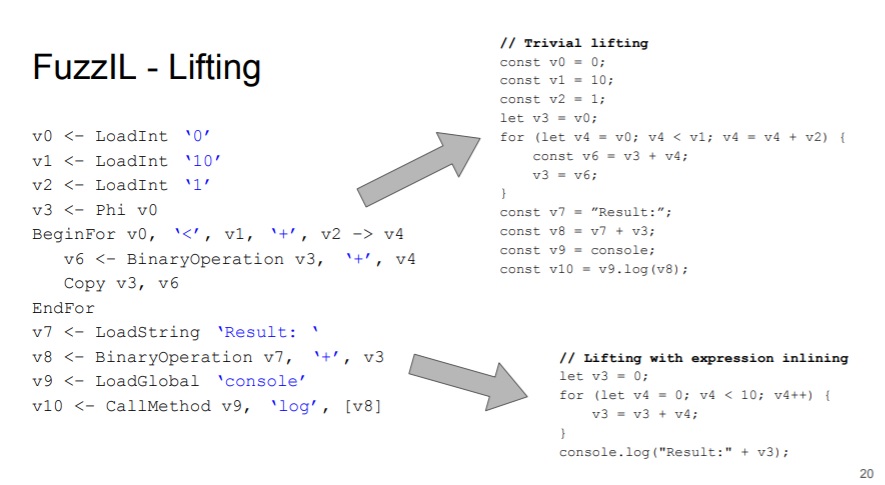
To resolve this, Saelo proposed an intermediate language - FuzzIL for generating JS code. He implemented the code mutation based on this IL. After that, we can pass these IL to different lifting and generate different corpus, as shown in the below slides:
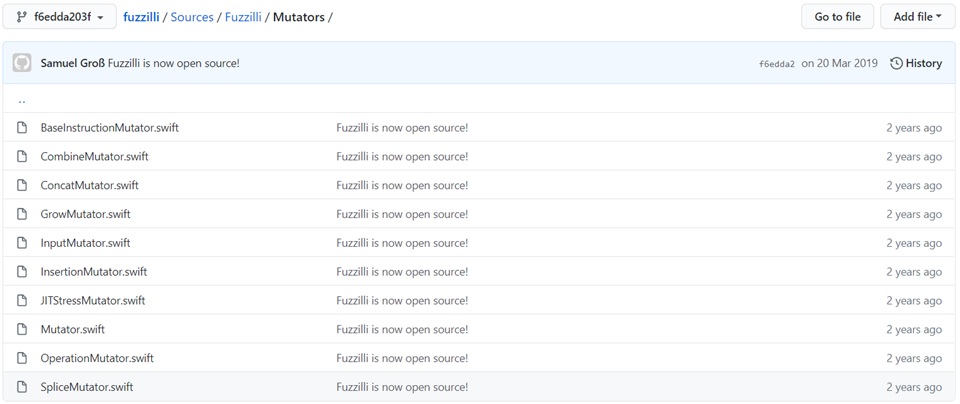
Fuzzilli comes with several mutators in the initial release, which can be found under ./fuzzilli/Sources/Fuzzilli/Mutators/.
Now, let’s get back to our goal. This newly released fuzzer reminded me of this post of Project Zero instantly. Bugs still appear after a year of release of Domato, which means that we may be able to find some bugs. We must first decide on our target as everyone out there are finding bugs at the same time. I ultimately chose WebKit among popular JS engines to fuzz.

My setup steps for fuzzilli (for the initial release):
# first setup the LLVM
wget -O - https://apt.llvm.org/llvm-snapshot.gpg.key | sudo apt-key add -
sudo apt-add-repository "deb http://apt.llvm.org/xenial/ llvm-toolchain-xenial-6.0 main"
sudo apt-get update
sudo apt-get install -y clang-6.0

# next setup swift for building fuzzilli (for old version of swift)
# https://tecadmin.net/install-swift-ubuntu-1604-xenial/
wget https://swift.org/builds/swift-4.0.3-release/ubuntu1604/swift-4.0.3-RELEASE/swift-4.0.3-RELEASE-ubuntu16.04.tar.gz
sudo tar xzf swift-4.0.3-RELEASE-ubuntu16.04.tar.gz
mv swift-4.0.3-RELEASE-ubuntu16.04 /usr/share/swift

echo "export PATH=/usr/share/swift/usr/bin:$PATH" >> ~/.bashrc
source ~/.bashrc

# next symlink clang
#https://stackoverflow.com/questions/1951742/how-to-symlink-a-file-in-linux

sudo ln -s /usr/bin/clang-5.0 /usr/bin/clang
sudo ln -s /usr/bin/clang++-5.0 /usr/bin/clang++

# next, install all the dependencies
# you may need to comment out some of the dependencies on WebKit's bash
sudo webkit/Tools/gtk/install-dependencies

# next patch the code, copy fuzzbuild.sh to the webkit directory and build the jsc
patch < webkit.patch
./fuzzbuild.sh

# next cd to fuzzilli's directory
swift build -Xlinker='-lrt'

# enable this
echo core >/proc/sys/kernel/core_pattern

# example command to run fuzzilli with 1 master+3 slave
screen ./FuzzilliCli --profile=jsc --storagePath=/home/fuzz/fuzzing1_master8888 --exportCorpus=true --networkMaster=127.0.0.1:8888 /home/fuzz/webkit-master/FuzzBuild/Debug/bin/jsc
screen ./FuzzilliCli --profile=jsc --storagePath=/home/fuzz/fuzzing1_slave8888-1 --exportCorpus=true --networkWorker=127.0.0.1:8888 /home/fuzz/webkit-master/FuzzBuild/Debug/bin/jsc
screen ./FuzzilliCli --profile=jsc --storagePath=/home/fuzz/fuzzing1_slave8888-2 --exportCorpus=true --networkWorker=127.0.0.1:8888 /home/fuzz/webkit-master/FuzzBuild/Debug/bin/jsc
screen ./FuzzilliCli --profile=jsc --storagePath=/home/fuzz/fuzzing1_slave8888-3 --exportCorpus=true --networkWorker=127.0.0.1:8888 /home/fuzz/webkit-master/FuzzBuild/Debug/bin/jsc
After fuzzing for a few days, although no crashes were generated, I found that the code coverage converged to 27% with very high sample validity. Below is a plot I prepared for the HITCON presentation, the orange line validated my observation on validity issue.
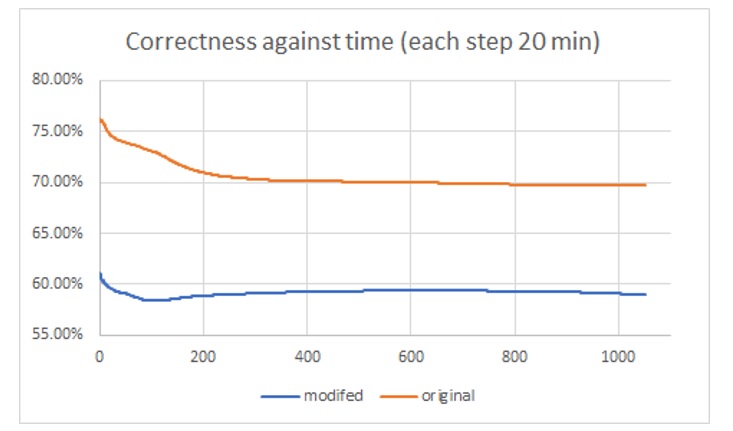
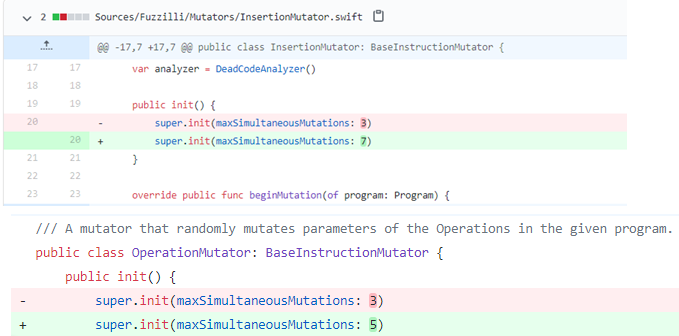
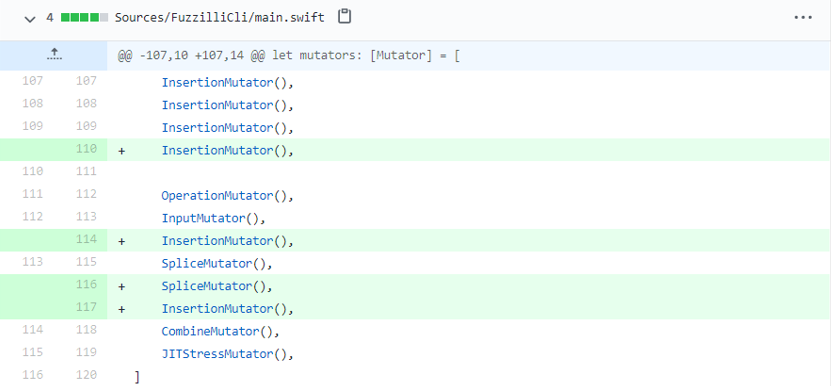
Since it’s meaningless to run fuzzers with high validity without crashing, I started to modify its mutation strategy and parameters to reduce the correctness of the fuzzer. It turns out this small trick works and coverage has increased slightly with decreasing validity and crashes finally happened.
Part of my patch (with modified parameters and code):
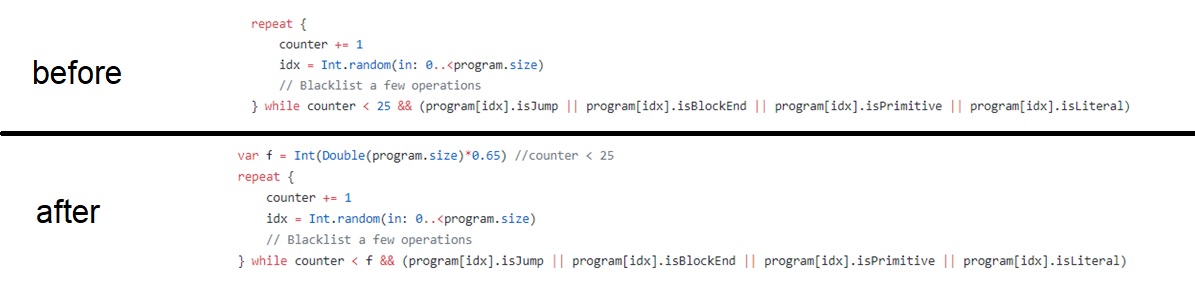
To scale up the fuzzing, I rented a 12-core machine from GCP and fuzzed for 1.5 months, with 4 cores running the original release as a control setup, and 8 running the modified version (with 1 master + 3 slaves in each setup). It appears that all the security crashes were from the modified version. I am not certain about the reason, it can be luck, possibly P0 or Apple has fuzzed these targets thoroughly with default configuration before open-sourcing it to the public. Since our setup keeps on report crashes after these minor modifications, we spent most of our time on crash triaging them and didn’t further modifing fuzzilli.
As a reference, our JSC fuzzing campaign lasted for around 2 months in 2019, we spent around $1000 GCP credit, which is also similar to the cost reported by @ifsecure in his blogpost. In return, we harvested 2 CVEs.
To gain the whole picture of how the fuzzer works, I suggest going through Saelo’s master thesis. Thanks Saelo and I learned a lot from his thesis.
Epilogue
In my next blog post (which I hope to finish as soon as possible), I will analyse on CVE-2019-8678, which I guess this might be one of the variants of wtf.js posted by qwertyoruiopz. Thanks for reading until here.
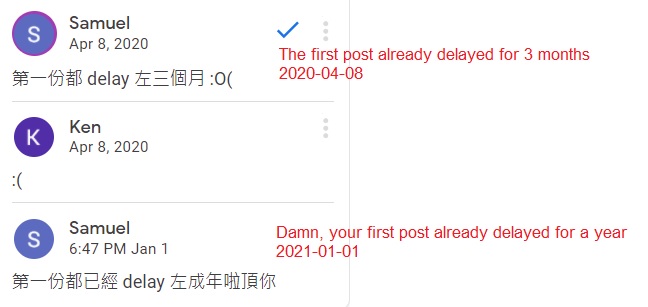
By the way, as my teammate @mystiz said, part two of the blog post may not appear any time soon. This episode is already delayed by an year already.
Reference
- https://blog.f-secure.com/super-awesome-fuzzing-part-one/
- https://arxiv.org/pdf/1812.00140.pdf